Settings & Customization
The earlier tutorials covered the core flow: workspace, model, conversation, and tools. Settings is where you manage how Helix works: where models come from, which tools the AI can use, which language the interface shows, and which defaults match your workflow.
Open Settings
You can open settings from either place:
- Click the gear icon in the top-right corner
- Click Settings at the far right of the bottom toolbar
Settings are grouped by category. When you're getting started, focus on LLM configuration, MCP tools, and Skills first.
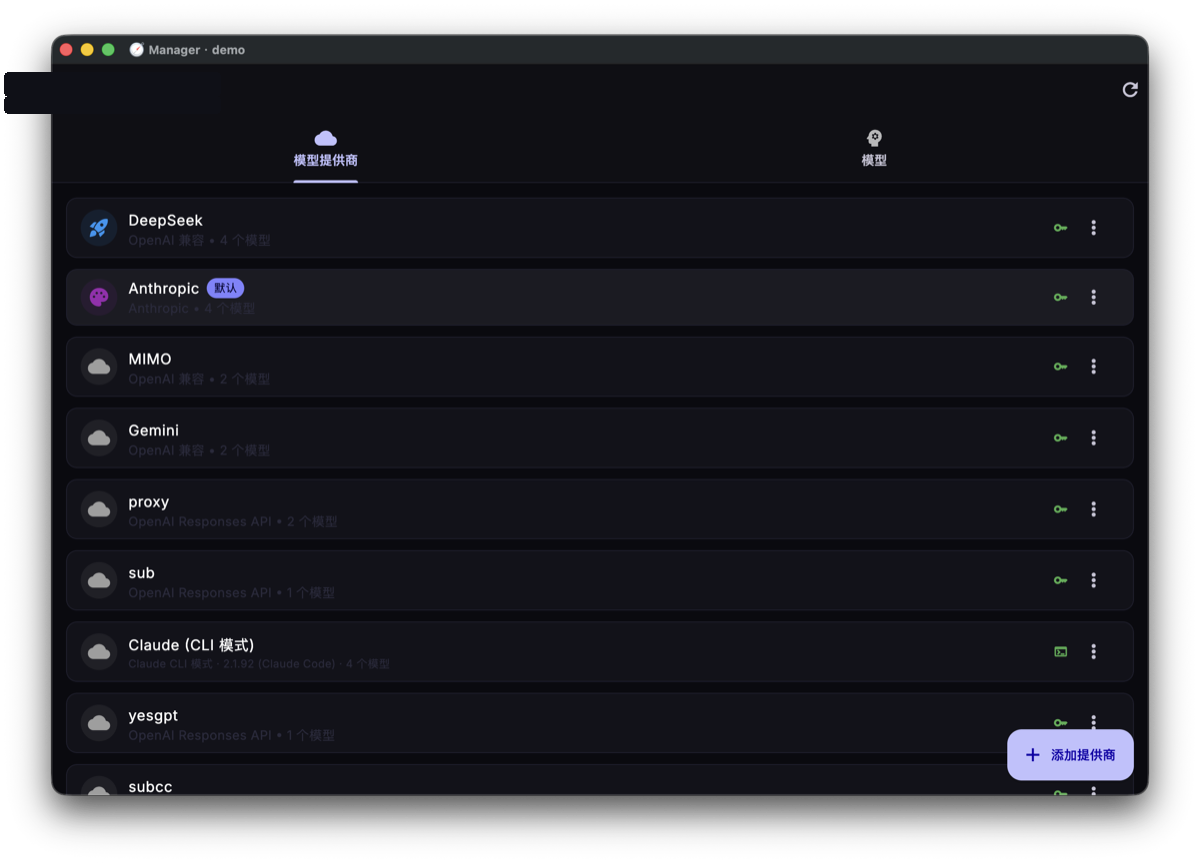
LLM Configuration
This is the core settings area for AI model services.
Provider Management
Here you can:
- View configured providers
- Add providers such as OpenAI, Anthropic, DeepSeek, or OpenAI-compatible services
- Edit connection details such as Base URL and API key
- Delete providers you no longer use
Model Management
Each provider can contain multiple models:
- Add models: enter Model ID, display name, and context window size
- Set a default model: choose which model new sessions use automatically
- Tune parameters: adjust temperature, max output tokens, and related options when needed
You can use a cheaper model for everyday work, switch to a stronger model for complex tasks, or keep a backup provider ready when one service is unavailable.
MCP Tool Configuration
MCP (Model Context Protocol) lets the AI connect to external tools and services. Think of it as the extension system for AI tools.
Here you can:
- View installed MCP tools
- Add local command-line tools or remote MCP services
- Enable or disable individual tools
- Edit tool parameters and launch configuration
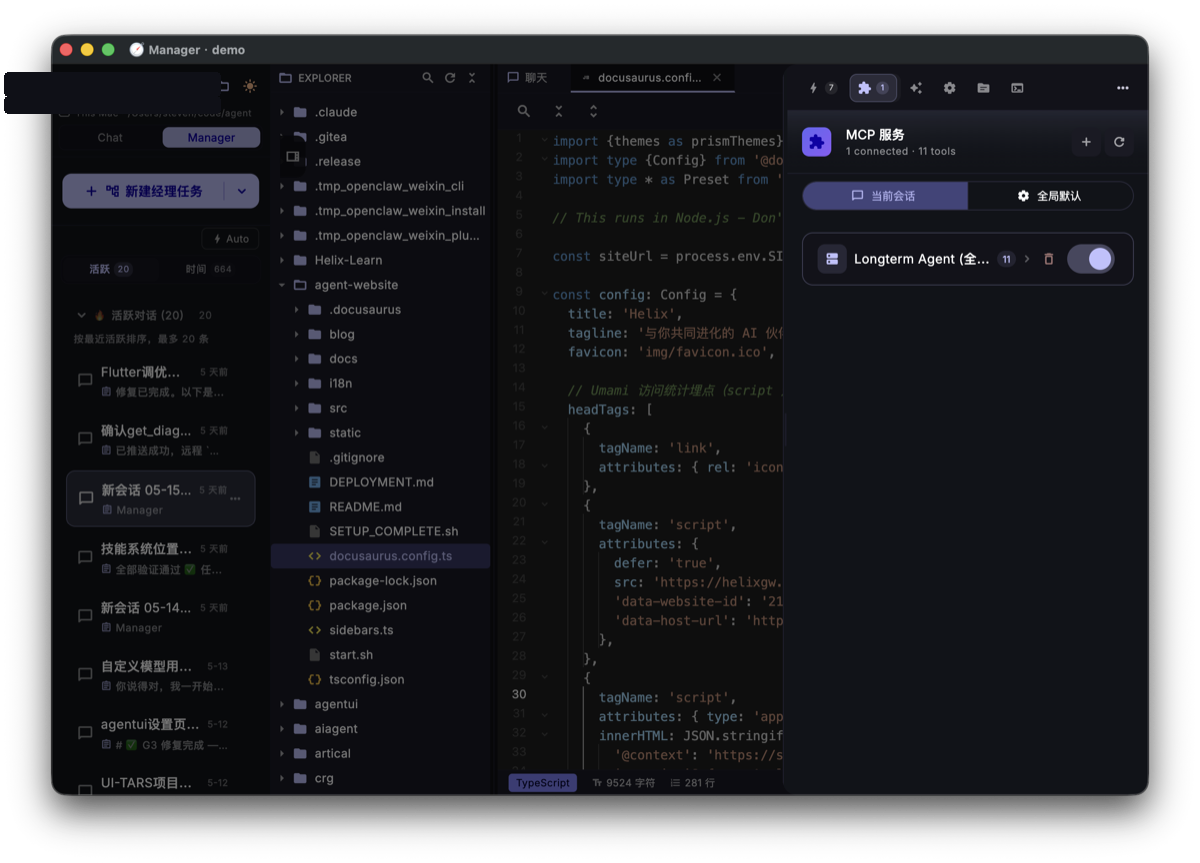
If the AI needs a capability it doesn't currently have — such as accessing an internal system, controlling a browser, or calling a custom script — MCP is usually where you extend it.
Skills Management
Skills are reusable operating instructions and context templates that make the AI more reliable in specific scenarios.
Here you can:
- View installed Skills
- Install new Skills from the built-in library or custom sources
- Create your own Skill
- Enable or disable individual Skills
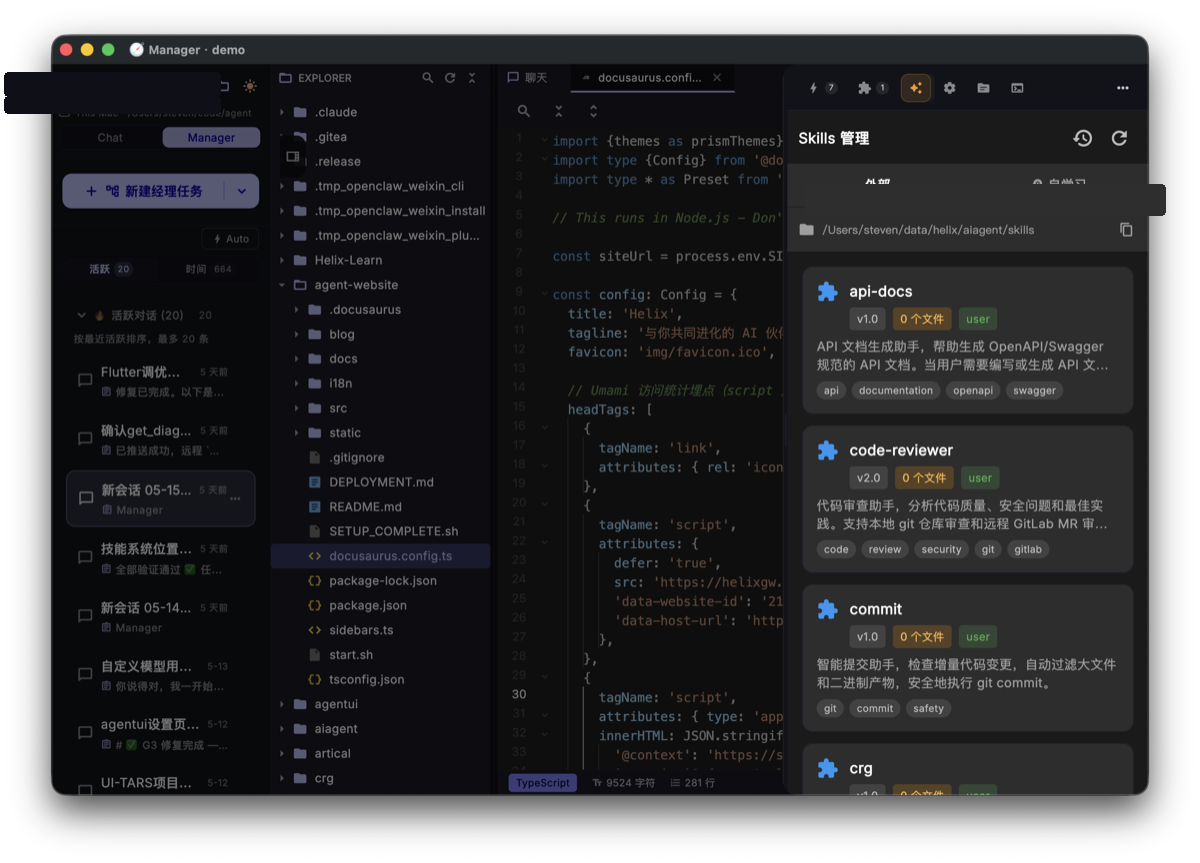
Good Skill candidates include team project conventions, fixed release workflows, recurring troubleshooting steps, and usage notes for specific tools.
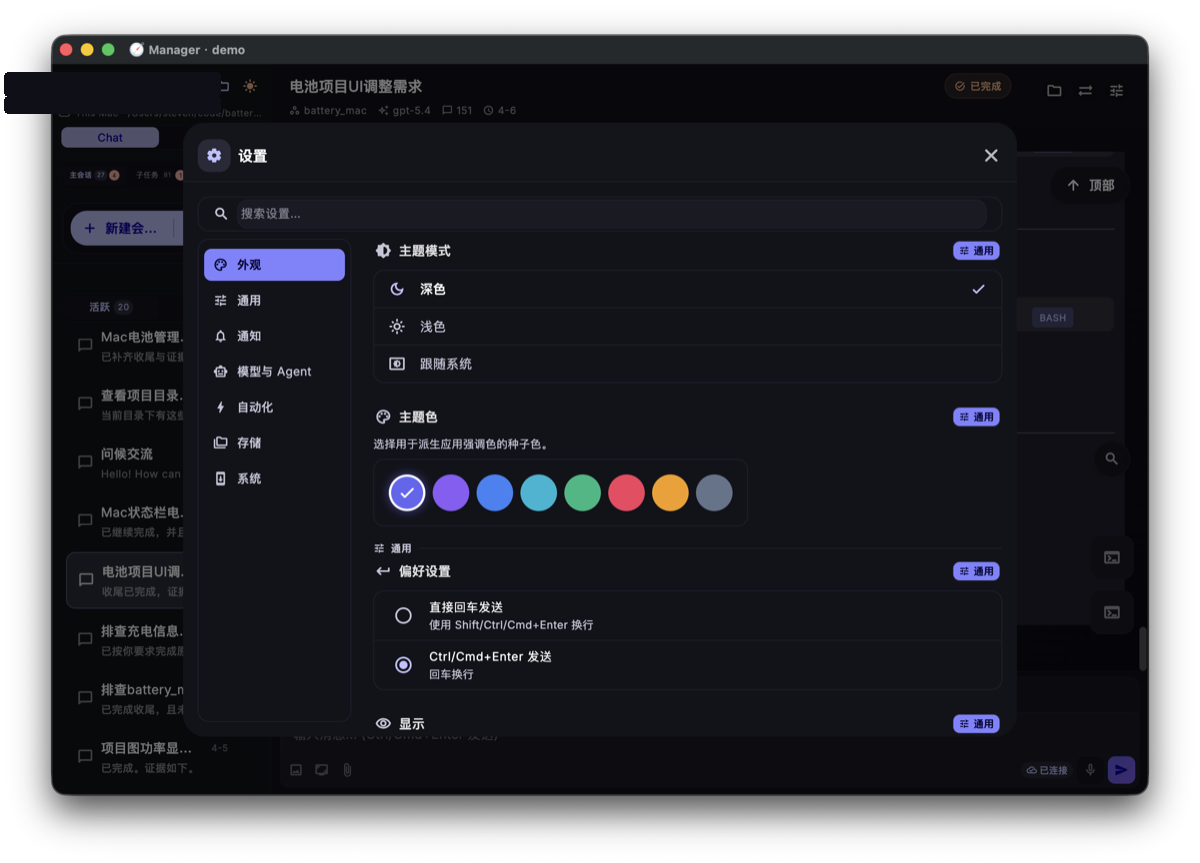
Appearance and Language
Theme
- Light / dark mode: switch from the top navigation bar
- You can also choose whether Helix follows the system theme
Language
- 中文 (default)
- English
Layout
- Desktop / mobile layout: switch using the layout button in the top navigation bar
Advanced Options
Once you're comfortable with the basics, you can tune these options:
| Setting | Description |
|---|---|
| Thinking mode | Controls reasoning depth, such as Max, Standard, or Off |
| Output style | Switches between concise and detailed answers |
| Prompt template | Changes or customizes the system prompt |
| Keyboard shortcuts | Adjusts common keyboard operations |
For most first-time users, the defaults are already good. Adjust advanced options only when you have a specific workflow issue to solve.
After the Basics
You've now completed the core Helix onboarding path. You should know:
- ✅ How to connect a workspace and machine
- ✅ What each major area of the Helix interface does
- ✅ How to configure and verify a model
- ✅ How to start a conversation, read tool calls, and follow up
- ✅ When to use Chat and when to use Manager
- ✅ How to use the built-in terminal and file browser
- ✅ Where the important settings live
Next, you can:
- 📖 Read Core Concepts for a deeper look at Helix's architecture
- 🛠️ Explore Workflow & Tools for advanced tool capabilities
- 📝 Learn to create custom Skills that teach the AI your project knowledge
Happy coding with Helix! 🚀